Innova 5410: Viewing Live Data
Introduction
The Innova 5410 lets you view and/or record Real-Time Live Data. This information includes values (volts, rpm, temperature, speed, etc.) and system status information (open loop, closed loop, fuel system status, etc.) generated by the various vehicle sensors, switches, and actuators. These are the same signal values generated by the sensors, actuators, switches, and/or vehicle system status information used by the vehicle's computer when calculating and conducting system adjustments and corrections. The real-time (Live Data) vehicle operating information (values/status) that the computer supplies to the scan tool for each sensor, actuator, switch, etc. are called Parameter Identification (PID) Data. Each PID (sensor, actuator switch, status, etc.) has a set of operating characteristics and features (parameters) that serve to identify it. The 5410 displays this information for each sensor, actuator, switch, or status that is supported by the vehicle under test.
If the vehicle must be driven in order to perform a troubleshooting procedure, always have a second person to help you. One person should drive the vehicle while the other person observes the Scan Tool data. Trying to drive and operate the 5410 at the same time is dangerous, and could cause a serious traffic accident.
|
|
Step 1 - While linked to the vehicle, start the engine, then press the LD button.
|
While linked to the vehicle, start the engine, then press the LD button. |

Step 2 - Wait for the 5410 to establish communication with the vehicle.
|
A One moment please message will display while the 5410 establishes communication with the vehicle. If the 5410 fails to establish communication with the vehicle, a Communication Error message will display.
|

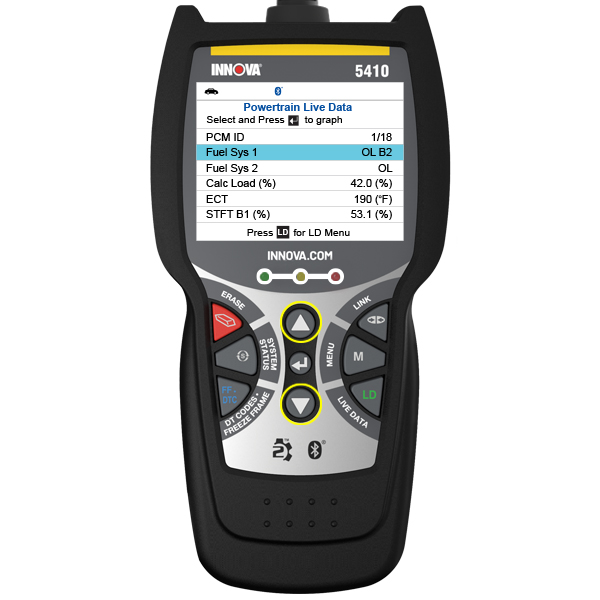
Step 3 - View your Live Data (PID) information.
|
Your Real-time Live Data (PID) information will display for your vehicle. If Live Data is not supported by the vehicle under test, an advisory message will appear. Press the System Status button to return to the System Menu. |

Note: The values for the various PIDs displayed may change as the vehicle's operating conditions change.
Step 4 - Press the UP ▲ and DOWN ▼ buttons to view all available PID data.
|
Only a limited amount of PID data can be displayed on the screen at one time. Press UP ▲ and DOWN ▼, as necessary, to view all available PID data. |
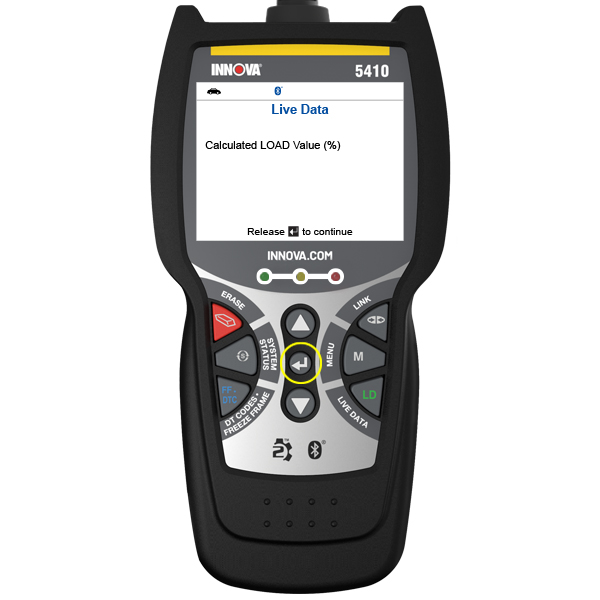
|
To view your currently selected PID's expanded definition, press and hold down the ENTER ↵ button. |
Step 5 - Select Graph to view the currently selected PID as a Graph.
|
Press ENTER ↵ to view the currently selected PID in Graph mode. |
|
The Graph mode will display. Press ENTER ↵ to return to the PID list. |

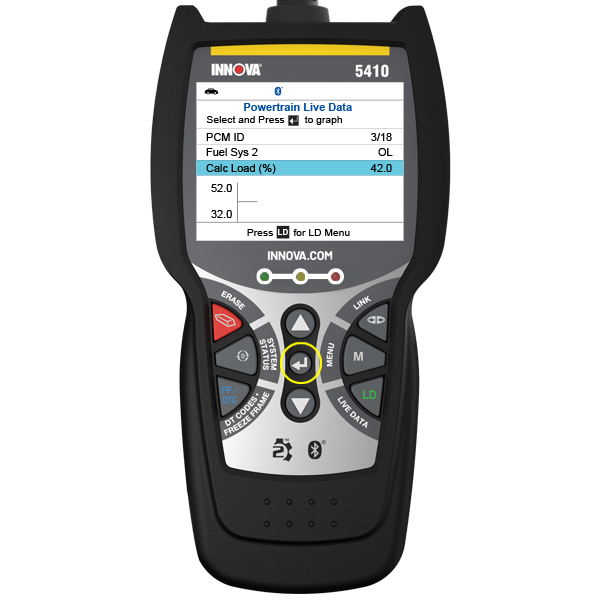
Note: You can display a maximum of two PIDs in Graph mode at any given time. With two PIDs shown in Graph mode, press and hold LD to superimpose one graph on the other. Release LD to separate the graphs.
You can also Customize the Live Data display to show only those select PIDs you are interested in viewing. See Customizing Live Data (PIDs) for details. You may also select to record Live Data for later viewing. See Recording Live Data for more information.